Making your first request
This page walks through the process of loading the Beamable Window in your project and creating a simple request to retrieve user information.
Notice
This tutorial assumes you have already set up your Beamable account and integrated the Beamable SDK into your Unreal project. For instructions on doing so, see the Setup Guide.
Accessing the Beamable window
When opening the Unreal Editor of your project, you will see the Beamable Logo in the upper-right, next to the Settings dropdown. This button opens the Beamable Editor Window. Here, you can log in to the account you just created in the Beamable Portal.
When the login process is finished, you should see the Beamable Window Editor like this:
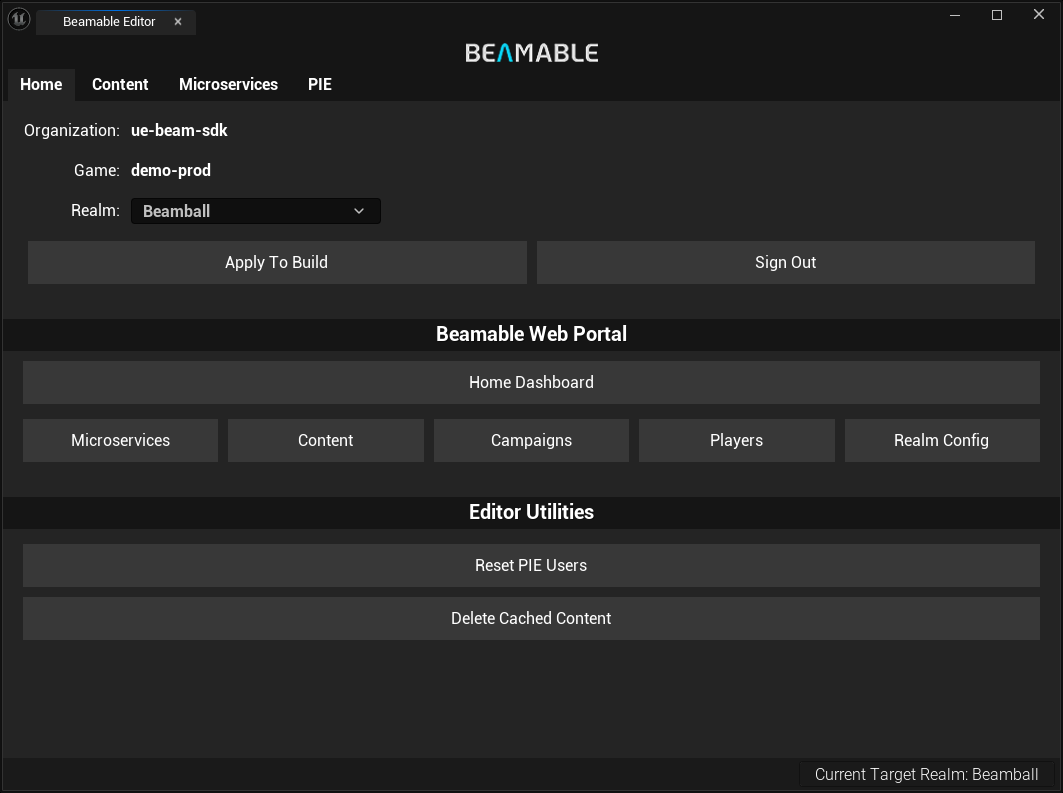
Here is a quick tour of the Beamable Window's functions:
-
Home Workspace overview, shortcuts to common Beamable Portal pages, and global utilities.
-
Content Manage your game's read-only content and configuration data.
-
Microservices Run, debug, and manage local Microservices.
-
Play-In-Editor (PIE) Configure PIE settings and create or capture PIE users.
Your first Blueprint request
With the Beamable Window open, make your first Beamable request. This guide uses Blueprint, but the same flow works in C++ via calls in your Project's GameMode class's BeginPlay function.
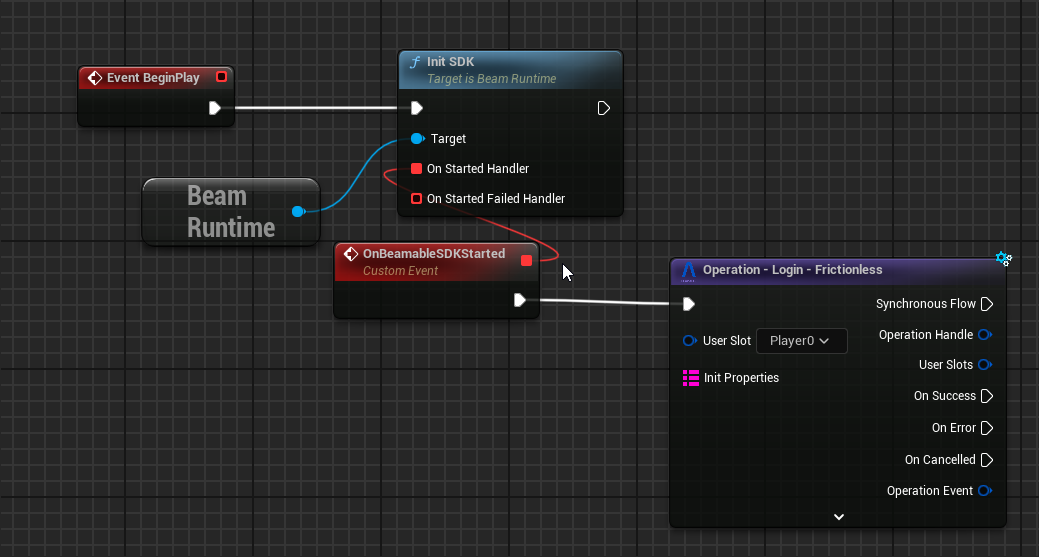
Open your Level Blueprint and add the following nodes:
How it works
The BeamRuntime is a GameInstanceSubsystem that is responsible for controlling the SDK's lifecycle and player authentication. Call this function to initialize the SDK. You can find a deep explanation about the Beamable Runtime in the Technical Overview page.
Once the SDK is initialized, the Login - Frictionless Operation node logs in a guest account automatically into the Player0 user slot.
Operation nodes are "purple" Beamable nodes that encapsulate complex bodies of functionality. See Operation Nodes for more information.
The Frictionless Login node has three flow pins to handle the result of the login operation:
- On Success: executes if the login completed successfully
- On Error: executes if any error happens during the login flow
- On Cancelled: used in very special cases; can mostly be ignored
If this operation succeeds, you will have a guest account signed-into the Player0 user slot.
With the SDK's default configuration and the above setup, enter PIE (Play-In-Editor). Several request responses appear in your Output Log window. After the final GetMe request, exit PIE. You have made your first request to Beamable.
Next steps
Now that you have made your first Beamable Request, see the Technical Overview page to understand more about how the SDK is structured and identify the best path to using it in your game.
Also, take a look at the Samples, which are a valuable source of practical information and good general reference.
Issues and reporting
- Use verbose logging
log Category Verbosewhen encountering an issue stemming from the SDK (Log Categories can be found inBeamableCore/BeamLogging.hfile) - This verbose logging will print a lot more information about requests being made and what the SDK is doing. It is meant to aid in diagnosing issues, NOT for production use. To turn it off in the same editor session, run
log Category Displayin the editor console - When reporting an issue, try to reproduce it with the logs of the relevant systems set to Verbose and attach them to the report
- For support or suggestions, see the Support Portal